


Epoxy resin kits are great at producing crystal-clear results for amazing and durable projects, unlike many resins on the market.
While they’re often used for crafts, like jewellery making and home decor, such as chopping boards and coasters, they can be used outdoors too.
However, using epoxy resin kits outdoors comes with its own set of challenges like UV exposure and weather that can affect its finish.
Here’s what you need to know if you’re looking to use epoxy resin for your outdoor project.
Why Use Epoxy Resin Kits Over Other Resins?
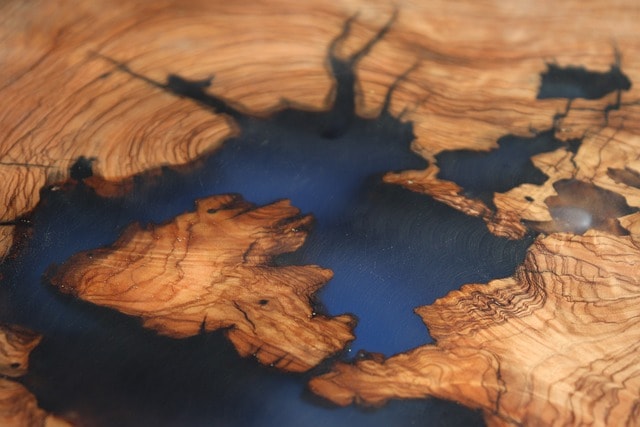
1. Strength and Durability
Epoxy resin is an excellent resin, known particularly for its exceptional strength and durability. Epoxy resin forms a very strong bond with most surfaces, making it ideal for structural applications and repairs. Once cured, the epoxy is heat resistant and impervious to any wear or handling.
2. Clarity and Aesthetic Quality
Many epoxy resins cure a high-gloss, crystal clear finish, which can be ideal for artistic projects like jewellery making, tabletop coatings, and decorative pieces. They often maintain their clarity without yellowing over time, although UV-resistant formulas can further enhance this attribute.
3. Versatility in Applications
Epoxy resin can be used for a wide range of applications including coating, casting, bonding, and sealing. This versatility means you can use one type of resin for multiple projects, whether you’re working on leisurely crafts or outdoor applications.
4. Easy to Work With
Epoxy resins generally have a longer working time compared to some other fast-curing, clear resins, such as polyester or polyurethane resins. This allows for more time to mix, apply, and position the material before it starts to cure, which can be beneficial for beginners or complex projects.
Expoxy resin is loved for its durability, glossy finish and versatility. When applied and protected properly, this clear resin can withstand outdoor conditions, making it great for:
- Outdoor Furniture: Coating table tops, benches and chairs for a glossy, protective finish.
- Garden Art: Creating sculptures, planters and decorative stones.
- Patio Decor: Making coasters and trays that can not only withstand the elements but are also non-toxic and food-safe.
Comparison with Other Resins:
Polyester Resin: While cheaper and quicker to cure, polyester resin has less adhesive power, more shrinkage, and a stronger odour. It is also more prone to yellowing over time which may ruin the aesthetic look you are going for.
Polyurethane Resin: Known for its flexibility and toughness, but can be more difficult to work with, has a much shorter pot life, and might require more precise mixing ratios. It is also less UV-resistant compared to epoxy.
Acrylic Resin: Offers excellent clarity and is often used in casting and embedding projects. However, it is not as strong or durable as epoxy resin and can be more sensitive to outdoor elements.
Main Benefits of Using An Epoxy Resin Kit Outdoors:
Durability and Heat Resistant:
Epoxy resin creates a hard, heat and scratch-resistant surface that can withstand impacts and wear, perfect for high-traffic outdoor areas.
Aesthetic Crystal Clear:
The high gloss, crystal clear finish of epoxy resin makes outdoor projects look polished and professional.
Customisation:
Epoxy resin can be tinted with pigments, embedded with objects and layered to create unique designs and effects.
Choosing the Right Epoxy Resin Kit
Not all epoxy resins are created the same, nor give all customers the same result. For outdoor projects, choose a deep pour resin that’s designed to withstand UV exposure and temperature fluctuations.
- UV Resin: Try to look for a resin with UV stabilisers to prevent yellowing and degradation over time. Resins with UV resistance are formulated to resist the sun’s damage.
- Flexible Resin: Choose a formula that remains slightly flexible after curing so it can expand and contract with temperature changes without cracking. Flexible resins are less likely to develop stress fractures in outdoor environments.
- Temperature Range: Make sure the resin you choose can handle the temperature range of your location. Some resins are good for hot climates, others for cold.
Preparing Your Workspace

Outdoor epoxy projects require a clean workspace to prevent contamination which could affect the quality of curing and the final finish:
- Clean Environment: Make sure your workspace is dust and debris-free. Clean your workspace before starting and consider using a dust cover during curing.
- Temperature Control: Work in temperatures between 21-24°C. Extreme temperatures outside this range can affect the results.
- Warm Environment: If you live in a cold climate, maybe use a space heater to maintain a stable temperature.
- Cool Environment: In hot climates, try to work in the morning or evening to avoid the peak heat of midday.
- Ventilation: Work in a well-ventilated area to avoid inhaling fumes especially if working with large quantities of resin. Use fans or work outdoors if possible.
A Guide To Applying Epoxy Resin Outdoors

Surface Preparation
Surface preparation is key to the adhesion and longevity of epoxy resin.
- Clean Thoroughly: Clean the surface to remove dirt, grease and dust. Use acetone for the best results. Any contaminants will prevent the resin from adhering properly.
- Sand the Surface: Sand smooth surfaces lightly to improve adhesion. Wipe away dust after sanding. This creates a rough surface for the resin to grip onto.
- Dry Surface: Make sure the surface is dry before applying resin. Moisture will interfere with the curing process and create cloudiness.
Mixing and Applying Resin
Mixing and application are important for a smooth, bubble-free finish.
- Accurate Measurement: Follow the manufacturer’s instructions for mixing resin and hardener. Measure precisely. Use graduated measuring cups to ensure accuracy.
- Thorough Mixing: Stir the resin and hardener slowly and thoroughly to avoid air bubbles. Scrape the sides and bottom of the mixing container to make sure all is mixed.
- Double Mixing: After the initial mix, pour the mixture into a second clean cup and mix again. This will incorporate any unmixed resin or hardener from the first container.
Pouring and Spreading
Proper pouring tools and spreading techniques will give you an even and professional finish.
- Slow Pour: Pour the mixed resin slowly to minimise bubbles. Use a spreader or a brush to spread the resin evenly. Pouring slowly will control the flow and reduce the chance of introducing air.
- Bubble Removal: Use a heat gun or torch to pass over the surface and remove bubbles. Keep the heat source moving to avoid overheating the resin. A hairdryer on low heat will also work in a pinch.
- Edges and Corners: Pay special attention to edges and corners, make sure the resin flows evenly and covers all areas.
Layering
For projects that require a thicker coating, layering is necessary.
- Multiple Layers: Apply in multiple layers for a thicker finish. Allow each layer to partially cure (get tacky) before applying the next to ensure proper adhesion.
- Timing: Follow the manufacturer’s instructions for curing times between layers. Applying the next layer too soon or too late can affect bonding and curing.
UV Protection
Protecting your epoxy resin projects from UV damage is key to outdoor longevity.
- Additives: Consider adding UV-resistance to the resin with additives for extra protection from the sun. These can be added to the resin before application.
- Top Coat: Apply a clear UV-resistant topcoat over the cured epoxy resin to add durability and protect against yellowing. Marine-grade varnishes are good for this purpose.
- Shading: Whenever possible, place your resin projects in shaded areas or use outdoor covers to minimise direct UV exposure.
Weatherproofing
To make your epoxy resin projects outdoor worthy you need to weatherproof them.
- Seal Edges: Make sure all edges and seams are sealed to prevent water ingress. Use painter’s tape to create clean lines and barriers during application.
- Protective Coatings: Apply additional weatherproof coatings, such as marine varnish, to add an extra layer of protection from moisture and UV. This is especially important for items that will be exposed to rain or humidity.
- Maintenance: Reapply protective coatings as needed to maintain weather resistance and extend the life of your projects.
Ideas For Outdoor Projects Using Epoxy Resin
Outdoor Tabletop
Create a custom epoxy resin tabletop with embedded objects like shells or stones for a one-of-a-kind look. Seal with a UV-resistant topcoat for longevity.
Design: Plan your design and arrange the embedded objects before pouring the resin.
Multiple Pours: For deep tabletops pour the resin in layers to prevent heat buildup.
Garden Art Sculptures
Make colourful garden sculptures with epoxy resin and moulds. Make sure they are fully cured and weatherproofed to withstand the outdoors.
Mould Selection: Choose moulds that are durable and suitable for outdoor use.
Colour and Texture: Play with pigments and textures to make beautiful pieces.
Decorative Planters
Make beautiful planters by coating terracotta or ceramic pots with epoxy resin. Add colourants or pigments for weather-resistant designs.
Drainage Holes: Make sure planters have drainage holes to prevent water accumulation.
Sealing: Apply a weatherproof topcoat to protect the design from the elements.
Maintenance and Longevity

To keep your outdoor epoxy resin projects looking and functioning great:
- Regular Cleaning: Clean the surfaces with mild soap and water. Avoid harsh cleaners that can scratch the resin.
- Inspect for Damage: Check for cracks or damage. Repair any issues as soon as possible to prevent further deterioration.
- Reapply Protective Coatings: Over time reapply UV-resistant and weatherproof coatings as needed to maintain protection.
Using epoxy resin for outdoor projects can make beautiful and lasting pieces. By choosing the right materials, preparing your workspace and following the right application techniques you can make professional-looking pieces that will withstand the test of time.
Whether you’re making furniture, garden art or decorative items these tips and projects will help you get professional results that last.