


Fibreglass has a range of applications, from yacht hulls to pond linings and flat roof coverings. Its excellent mechanical and waterproofing capabilities mean its subjected to some of the most demanding conditions.
Sometimes, the limits of fibreglass are exceeded and its cracked and split, exposing the underlying substrate and limiting its structural properties.
Repairing Like-With-Like
A key benefit of fibreglass is its versatility; effective repairs can be made using fresh fibreglass almost anywhere and at any time, restoring the structure to a state which is as good, if not better, than new.
Checking For Fibreglass Damage
The following guide assumes adequate precautions have been taken to
This guide details the recommended procedure for repairing a crack in fibreglass.
How to Repair Cracks in Fibreglass (GRP)
The following guide assumes adequate precautions have been taken to ensure a safe working environment. It also assumes users have the correct tools and materials available and have taken adequate care to prepare the underlying pond structure and surface.
This procedure is for hand-layup fibreglassing only.
Note: only use polyester resin as the matrix phase if the original fibreglass contains polyester resin.
| Structure | Structures Suitable For Repair | Example Applications |
|---|---|---|
| Roofing | Flat roof repairs and refurbishments | Early-stage roof leaks, |
| Marine | Boat, yacht and dinghy hulls | Punctures/holes in marine structures. |
| Home & Garden | Ponds and water features | Repair of cracks and aged linings. Refurbishment of existing linings and coatings. |
| Containment Systems | Storage tanks | Repair of cracks and aged linings. Refurbishment of existing linings and coatings. |
A variety of fibreglass-based structures are prone to cracking. These range from (but are not limited to) yacht, dinghy and canoe hulls, car body kits and spoilers.
 Fibreglass repair kit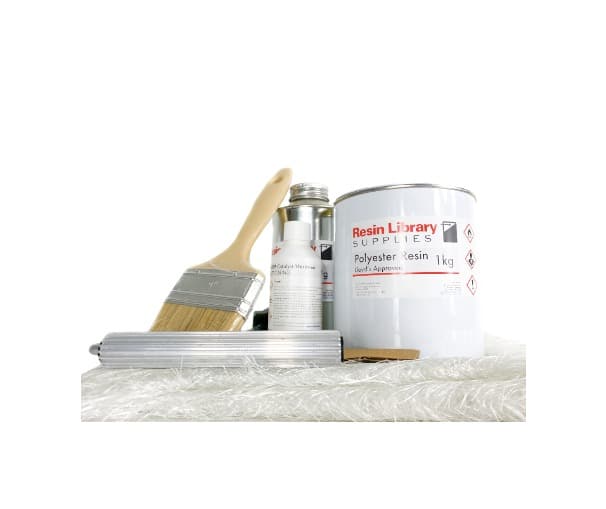
Note: any grinding should be sure to wear goggles, mask and gloves.
Note: this article assumes that access to the inner region of the structure is accessible. The first section of this guide will focus on repairing the cracked region from the inside prior to making a repair to the outside.
- Identify the damaged area(s): when the problem area or areas have been identified, ensure it has been drained of any liquid and is dry.
Note: moisture, chemical contaminants and other impurities like dust and grease interfere with the resin binding process.
Note: Moisture interferes with curing. If necessary, a moisture monitor can be purchased to quantify the moisture content inside the surface.
- Remove loose debris: if there is excess debris on the surface, it may be more practical to remove that first, prior to drying it out.
- Position damaged region in place: the damaged section could have been dislodged, so some repositioning may be required to ensure the repair retains its original structure.
Note: fibres in the existing structure will have been torn, so some grinding back of the crack is recommended. This will encourage the structure to return to its original position and facilitate the repair.
Note: please wear PPE (gloves, goggles and a mask) when using a grinder.
- Secure damaged region in place: the damaged region is likely to be loose. For a stable repair, fix the damaged region in place using something stiff like timber or metal glue into place. Apply this to the outside as the initial focus will be to first repair the inside of the structure.
- Turn the structure over to present the inside: use a grinder or sander to scale back the inside of the structure to remove any fragments and sharp edges.
Note: the level of abrasion required could range from sandblasting to grit blasting if the existing layer is bound strongly to the underlying substrate.
Note: preferably, you want to have a rendered finish here with a slight texture. This is to ensure the surface is fairly flat and smooth to allow the glass fibre matting to be laminated onto.
Note: again, safety is an important consideration here. Care should be taken to avoid exposure to dust and debris via inhalation (use a dust mask), eyes (wear safety goggles) and skin (sharp debris can penetrate the skin).
- Clean Surface
Once surface preparation has been performed, there is likely to be a degree of dust and debris. This should be removed to create a clean surface amenable to resin adhesion. Excess dust will interfere with laminate adhesion to the surface. Wipe down with acetone to ensure the surface is fully cleaned.
- Cut the glass fibre mat (CSM)
Measure the dimensions of the matting and cut to size.
Note: cut and size the CSM in advance of resin application to pre-defined, square meter sections. In such cases, the size should be around 10% larger than needed to ensure complete coverage of the repair section.
Note: for cracked fibreglass, a single layer of matting should suffice. If more depth is added, prepare successive layers of matting in advance.
- Apply Primer (Optional)
A primer strongly recommended to increase adhesion, protect the pond wall from external water ingress, which can carry ground-based pollutants.
Note: apply a thin amount of the primer directly to the surface. Allow to cure to for 30 to 60 minutes – the finish should be sticky and at this point.
- Polyester Resin-MEKP Catalyst Preparation
In a clean bucket, measure out a workable amount of polyester resin. An MEKP catalyst needs to be added to the polyester resin prior to application to facilitate curing. This is added in a 1 – 4 % weighted ratio to that of the resin. Amounts added outside of this range will lead to sub-optimal curing and laminate failure.
Note: for repairs, it would be wise to provide an excess of resin in advance. In general, the amount of resin per square metre of catalysed resin should be similar to the range detailed in the table below, as per laminate design.
| Laminate Design | Glass Fibre Matting | Number of layers | Resin Weight per Layer | Total Resin Weight |
|---|---|---|---|---|
| Single Layer | 450 gram | 1 | 1.1 - 1.3 kg/m2 | 1.1 - 1.3 kg/m2 |
| Dual Layer | 2 | 2.2 - 2.6 kg/m2 | ||
| Single Layer | 600 gram | 1 | 1.5 - 1.7 kg/m2 | 1.5 - 1.7 kg/m2 |
| Dual Layer | 2 | 3.0 - 3.4 kg/m2 |
How Much Catalyst Should Be added?
Generally MEKP should be added at 1 – 4 % of the resin weight, as detailed below, but preferably 1 – 2.5 % to avoid rapid curing. Amounts of catalyst outside of this range are not recommended as they will lead to sub-optimal curing and premature laminate failure.
| Curing | Hot weather | Warm weather | Cool weather | Cold weather |
|---|---|---|---|---|
| Catalyst (%) | 1 (%) | 2 (%) | 3 (%) | 4 (%) |
| Resin Weight (kg) | MEKP Catalyst Volume (mL) | |||
| 1 | 10 mL | 20 mL | 30 mL | 40 mL |
| 2 | 20 mL | 40 mL | 60 mL | 80 mL |
| 3 | 30 mL | 60 mL | 90 mL | 120 mL |
| 4 | 40 mL | 80 mL | 120 mL | 160 mL |
| 5 | 50 mL | 100 mL | 150 mL | 200 mL |
- Lower concentrations of catalyst (1 – 2 %) will deliver slower curing rates. A preference for a slower curing rate is desirable when temperatures are higher (e.g., summer). This is because the resin will harden quicker, so users have less time before the resin cures
- Higher concentrations of catalyst (3 – 4 %) will deliver faster curing rates. A preference for a faster cure rate is desirable for when temperatures are lower (e.g., winter). This is because the resin will take more time to cure, meaning that users might want to speed things up a bit.
Note: prepare workable amounts of catalysed resin in advance as it takes time to prepare.
Note: Once the catalyst has been added, mix with a clean paddle until there is a minor colour change.
- Apply Catalysed Resin to Glass Fibre Matting
Once the glass fibre has been fitted in place, a standard paintbrush of a polyester roller should be used to disperse and drive the resin into the mat, applying moderate pressure.
Note: again, this should be performed when the weather is dry; water and even low levels of moisture interfere with the curing process. If in doubt, it is better to wait until there is a dry spell to perform this work.
- Consolidate the Laminate
Immediately after the wool roller has saturated resin in the glass fibre matting region, use a paddle roller to refine the laminated surface. Moderately roll the paddle roller across the laminate surface.
Note: the aim here is to drive air and bubbles out, ensuring a more consistent resin-to-glass fibre ratio and blend the laminate repair into the existing structure.
Note: paddle rollers used on smaller or more awkward repairs may not be suitable. Instead, the use of a paintbrush is recommended.
- Allow Laminate to Cure
Once the laminate has been consolidated, allow it to harden or ‘cure’. This allows time for the resin to ‘crosslink’ and create a strong, seamless structure.
Note: Recommended curing time = 24 hours (winter) and 12 hours (summer).
Note: if this step has been performed at an earlier point or has been exposed to dust, please take care to remove dust and excess debris from the surface by wiping with a clean acetone-soaked cloth. Impurities like dust and dirt will interfere with the bonding process of an outer layer.
Note: it is important to inspect the quality of the fibreglass repair. Reasons for poor quality laminate and recommended solutions are detailed in the table below.
| Problem | Cause | Solution |
|---|---|---|
| Exposed fibres | Poor laminating techniques and/or insufficient resin usage. | Sand back protruding strands and re-apply polyester resin. Ensure correct laminating procedures followed. |
| Insufficient fibreglass coverage of substrate | Insufficient materials/incorrect calculation of surface area. | Sand back region, clean surface and re-apply a layer of fibreglass. |
| Pinholes | Insufficient quantity of resin applied to glass fibre matting. | Wipe and clean surface with acetone. Apply another layer of catalysed resin. |
| Splits/cracks | Incorrect mixing procedures (e.g. wrong catalyst-resin ratios, premature curing of resin) and/or contaminating during application. | Remove sections of laminate and re-apply a new layer using correct procedure. Ensure correct material preparation and procedures are followed. |
- Sand the Laminate
Once the laminate has cured and is not tacky to the touch lightly sand back the surface. A grinder may be required for larger more jagged repairs. Remove any dust and clean using an acetone wipe. The purpose is to ensure a neat finish without compromising the fibreglass repair.
Note: this section concludes the repair of the inner surface. The next section will detail the repair of the outer surface of the fibreglass structure.
- Position Object Outside Facing Up
Once the repair has cured on the inside, present the outside of the object and remove the support structure. The outside of the crack should now be presented.
- Scale Back Damaged Section
Using a grinder or sander to create a minor groove to allow the glass fibre matting to be inserted.
- Place Masking Tape Around Repair
To protect the main body of the structure, place masking tape around the edges.
Note: aim to create a perimeter around the damaged region that will protect the main body of the structure from the fibreglass repair and associated works.
- Repeat steps 6 – 13:
Create a neat layer of glass fibre mat and fit into the groove, prior to laminating.
Note: Recommended curing time = 24 hours (winter) and 12 hours (summer).
Note: for cosmetic reasons and to help the matting blend into the groove region, it might be easier to tear the matting rather than cut it.
- Scale back the repair: once the fibreglass repair has cured, use a grinder or sander to scale back the laminate, taking care to create a finish that is in line with the main body of the structure.
Note: a sander may be a preferred tool as it is more forgiving and safer to work with.
Note: the glass fibre strands on the repair are likely to create a textured surface. Use a sander or grinder to carefully scale these back. This should create a uniform finish.
- Prepare Topcoat (Flowcoat)
Once the laminate has hardened, prepare the topcoat or paint.
The aim here is to find a resin or paint which matches the existing finish for both cosmetic and protective purposes. This may be a standard topcoat, which is both highly durable and ideal for building applications, or a more bespoke paint.

Note: this step is highly bespoke and so should be conducted in line with the colour scheme on the existing structure.
- Remove masking tape: remove the masking tape and you will have completed the repair to the damaged area.
Disclaimer: this article is intended for general informational purposes only. Resin Library is not liable for any outcome. Please consult professional advice before undertaking any work.
Frequently Asked Questions (FAQs)
Q. What types of surfaces can be repaired with fibreglass?
A. The following video shows just one example of a fibreglass repair of an existing water storage tank. The tank had holes, cracks and was in need of replacement. Instead, it was repaired and refurbished with a fibreglass repair kit.
Q. Why does fibreglass crack?
Fibreglass will crack if its mechanical properties are exceeded. The reason for this could be an extreme impact or the result of poor quality laminating.
According to Eric Greene Associates, “the key criterion for composite failure is the local strain to failure: ε’ a.k.a. elongation at break and not stress (note that ε’ for the fiber/matrix interface i.e. transverse fibers ≅ 0.25 %)”, as ilustrated in the tables below.
| Resin Type | Elongation at Break (ε’) |
|---|---|
| Polyester | 0.9 - 4.0 % |
| Vinyl Ester | 1.0 - 4.0 % |
| Epoxy | 1.0 - 3.5 % |
| Phenolic | 0.5 - 1.0 % |
| Fibre Type | Elongation at Break (ε’) |
|---|---|
| S/R Glass | 4.6 - 5.2 % |
| E-Glass | 3.37 % |
| Kevlar 49 | 2.5 % |
| HS-Carbon | 1.12 % |
Q. What types of cracks form in fibreglass?
A. Radial cracks (also known as spider cracks and star cracks) occur when a fibreglass surface is impacted by an object – or if a fixture or bolt places excess strain on the surface, causing the fibreglass to crack around it. Linear cracks, on the other hand, are the result of flexural strain, whereas temperature-based racks (thermal fatigue cracks) arise when the topcoat or gelcoat repeatedly expands and contracts due to temperature fluctuations.
Q. Why Choose Fibreglass as a Repair System?
A. Fibreglass (GRP) is an excellent material to use for repairs on a range of different products. The obvious thing you think of firstly would be fibreglass flat roofs, but it can also be used to seal pipes, pond linings, any form of grp boat, canoes, surfboards, tanks and pond linings, to name but a few. Fibreglass is formed with polyester resin, matting, a catalyst (hardener) and a topcoat colour finish. Fibreglass is lightweight, flexible, durable and can be moulded into almost any shape required. It is also relatively inexpensive when compared to other products on the market. Fibreglass also has fantastic waterproofing qualities. Once laminated and cured water will not penetrate through the repair. When in doubt, always talk to a fibreglassing specialist who can advise on the technical aspects of the repairs and can give you sound advice on quantities required costs etc.
Once the crack has been repaired, it is generally a good idea to monitor it over a period to ensure it is functioning correctly.
Q. How much does it cost to fix a fibreglass crack?
A. This depends on the size and quantity of cracks. for a small crack of 50 mm x 50 mm, assuming the underlying structure has not been compromised, a 50 % workmanship fee and 50 % material cost is common – if choosing a professional. The cost of a DIY project is obviously cheaper. For more complex tasks, a premium on workmanship costs is to be expected. As such, Resin Library provides customers with detailed guides that cover the basics, video instructions and experienced technical support.
Q. Can I repair damaged fibreglass using epoxy resin?
A. Yes, though considerably more expensive and requires stricter handling and mixing ratio procedure. Many epoxy resin systems are ideal for damaged fibreglass. Epoxy resin is an excellent adhesive that penetrates gaps and forms a durable bond to support fibreglass laminates as well as other substrates like wood and metal.
Q. How reliable is a fibreglass repair?
A. If undertaken correctly it should be at least as strong as the original laminate and provide comparable longevity. The repair of fibreglass composites occurs across many sectors, from the marine sector to renewable in the case of fibreglass wind turbines. More detail on the repair of fibre-reinforced composites can be found in composite handbooks.