Product VideoCalculators Learn more

Fibreglass Repair Kit

Fibreglass is an excellent repair material. As a composite – a blend of polyester resin and glass fibre chopped strand matting – it enables the creation of a strong, lightweight and seamless waterproof and chemically resistant barrier. Notably cheaper, more flexible and simpler to apply than epoxy resin-based repairs, it is a preferred option for many users.

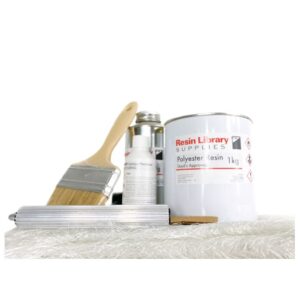
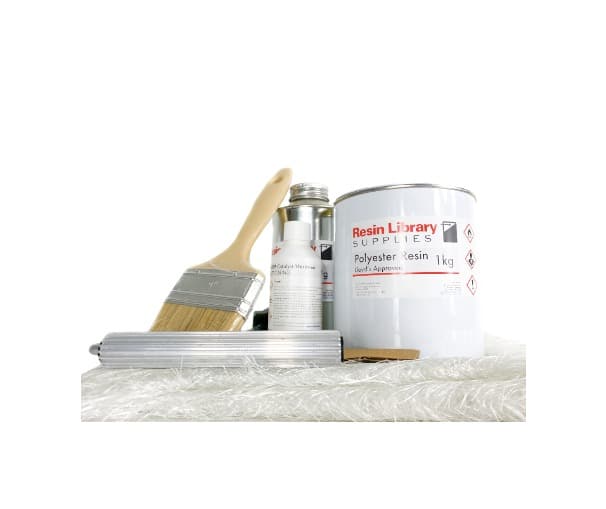
Each kit comes with the necessary materials and tools (optional) needed to make a high quality repair.

Price range: £24.00 through £128.00

Send to a Friend

Description

Resin Library supplies Fibreglass (GRP) Repair Kits in sizes ranging from 0.25 up to 5 m2.

These kits are designed to repair materials and surfaces impacted, aged or require refurbishment. Classic examples include the repair of leaks, holes, dents, cracks and fractures.

Two key ingredients include polyester resin and glass fibre matting. The polyester resin is UV stable, offers a degree of flexibility to the laminate and is WRAS compliant. It is a reliable, proven brand suitable for both indoor and outdoor applications. Glass fibre chopped strand matting (CSM) is 600 g. MEKP catalyst (hardener) is required for resin curing and an appropriate quantity is supplied with each kit. Both materials are produced in an ISO9001-compliant environment.

Suitable for building repairs (e.g., flat roof repair, skylight waterproofing, gutter linings, storage tank repairs, etc.), as well as vehicles (e.g., caravans, car bumpers, car bodies, van and truck lining and marine structures (e.g., boat hulls, yachts, and surfboards).

Note: ensure any leak has been detected and rectified in advance. Instances where the source of the leak has not been addressed – or if water ingress remains inside the structure – will lead to a defective repair. Furthermore, moisture contamination or dampness on or in close proximity to the repair region will interfere with curing and dehydration should be performed well in advance.

Catalyst (MEKP) is included.

Primer (purchased separately) is recommended for surfaces prone to dampness, offering lower adhesion (e.g plywood, steel, etc.) or if external contaminants are an issue (e.g. ponds).

Topcoat (purchased separately) can be used in instances where an aesthetic design is required. More bespoke paints can also be applied to the laminate repair but please check with the paint manufacturer in advance.

Applications

Fibreglass is a versatile repair material compatible with a range of substrates, from existing GRP to wood (e.g., timber decking and plywood) steel and concrete.

Take care to ensure that adequate surface preparation has been undertaken in advance. This will centre on ensuring: (1) the source of any leak has been identified and stopped, (2) the surface is dry, (3) loose debris has been removed and adequate support has been installed prior to any application.

Able to make fast repairs, they can create a seamless, durable and waterproof barrier that bonds well to a variety of substrates, it also has a high strength-to-weight ratio and an ability to be moulded into almost any shape, ultimately restoring the structure back to its – or close to – its original condition.

Recommended repairs are listed below:

  • + Boat hulls and decks
  • + Flat roofs
  • + Surfboards
  • + Composites
  • + General GRP
  • + Storage tanks
  • + Bathtubs
  • + Vehicle bumpers (e.g. front/rear car bumpers)

Some of the many examples of repairs made using Resin Library’s Fibreglass Repair kits are shown below.

Note: if your repair is for a structure that will undergo significant structural demands, one in which the safety of users or those nearby may be impacted, and/or part of a high-value component, please contact the manufacturer or supplier to ensure a recommended repair system is used. Resin Library is not liable for any outcome. 

Causes of Structural Damage

The primary factors that reduce the performance of composites and metals centre on environmental conditions, temperature, chemical contact, humidity/water ingress, poor quality design, mechanical (exposure to excessive stress, compression, shear and/or impact) and manufacturing defects. Composite materials are a well-discussed area and much focus is on fatigue mechanisms of thermoset and thermoplastic composites like carbon fibre.

Guides

Creating a reliable repair requires a degree of skill, care and attention. Indeed, composite repairs are the subject of much research in automotive, marine, construction and aerospace applications.

Users should ensure the existing surface and underlying structure have been dried out, is free from contaminants (dust, debris and grease) and is clean. In some cases, a resin primer may be required to promote adhesion.

Our instructional step-by-step guides cover a wide range of topics and exist in both written and video formats on these types of repairs. Technical support is also available for more bespoke applications.

Key Processing Information

Repair kits should be stored in a cool, dry place away from sunlight.

Surface preparation is a critical step in creating an effective repair. Applicators should ensure the surface has been sufficiently dried, cleaned and rendered to maximise adhesion.

A primer (optional) is recommended to promote adhesion between the fibreglass and the surface being repaired.

Users should tape off areas of the surface that do not need repairing. Resins can be quite messy and stick to surfaces easily.

Users should ensure the surrounding atmosphere and any surfaces should be clean, dry and free of contaminants (dust, grease, moisture, debris, mould, etc.). More detailed instructions on repair preparation and application can be found in our step-by-step guide.

More specific product information can be found in the Technical Datasheets for each product, as well as on individual product pages for the resin, CSM (E-glass), resin topcoat and MEKP catalyst.

  • Suitability: professional repairs, DIY and hobby usage
  • Safety Precautions
    • Wear PPE: gloves, goggles and if working with resin, a mask unless working in a well-ventilated area. Use protective gloves when handling.
    • Read the MSDS in advance, plan ahead.
  • Recommended working conditions: dry, ambient conditions (15 – 30 oC)
  • Can be used from 15 to 30°C provided the atmosphere and surfaces are dry
  • Resin-600 gram CSM ratio:  prepare 1.5 – 1.7 kg of catalysed polyester resin prior to application. Mix carefully with a clean mixing stick on a mixing tray.

Application

  • Measure dimensions of the area for coverage in advance. Cut to size using a stanley knife. Glass fibre matting should be 10% above the desired surface area to accommodate trimming and ensure complete coverage. A smaller layer of matting should be applied on top immediately after laminating. The second layer is designed to add structural support.

Storage

  • Unopened shelf-life minimum of 12 months.
  • Store at 2 – 20 oC in a clean, dark environment sealed inside an air-tight bag.
  • Avoid moisture and other contaminants (liquids and particulates).
  • Once opened, immediately seal after use. Use within 3 months

Safety

  • Wear protective eye goggles at all times
  • Utilise protective gloves to avoid splintering when handling.
  • Use in a well-ventilated area or use a chemical mask
  • Consider resin safety recommendations when laminating.

Quality

Resin Library’s polyester resin is manufactured in the UK in an ISO9001 compliant environment. It is used by leading flat roofing brands and is a high-performance ingredient in many composite applications.

Causes of repair failure

Repairs to surfaces (e.g. timber, plywood and existing GRP, etc.) are generally very effective. They can restore the surface to its original form – provided sufficient care and attention are paid. Yet they are not as simple as placing a patch of matting and applying resin. 

Indeed, fibreglass repair guidelines – and many other forms of composite repair – are the subject of significant research and development across many industries using composites. The practice is as much an art as it is a science and such repairs have significant implications for the lifetime and performance of the structures being repaired. 

This section describes some of the issues that can occur when repairs are ineffective:

  1. Substructure: damage to both the impact site and the underlying structure can occur. If the substructure is not attended to, then the repair may only be superficial. This can lead to structural problems at a later point if the underlying structure has not been properly supported with a filler. Some publications provide detail on locating, identifying and implementing composite repairs.
  2. Incorrect preparation: fibreglass is a combination of glass fibre CSM and polyester resin (itself catalysed by MEKP catalyst). To ensure an effective repair, make sure work is undertaken in accordance with technical guidelines and applied in a timely manner
  3. Sharp edges and corners: the application of CSM to any surface should avoid sharp edges and corners. These create high levels of stress and so should be sanded back to create smoother profiles, whilst also avoiding a breach of the repair upon impact. 
  4. Water exposure: a dry surface is required to maximise bonding. Laminates are initially wet and malleable and at this point, are sensitive to moisture. As such, the repair surface should be dried out in advance and should be protected from rainfall and other forms of moisture contamination until it has cured/hardened. 
  5. Surface contamination: the surface being repaired must be clean and dry to maximise adhesion. Once sanded back, it should be wiped with acetone cloth to remove contaminants such as dust and other dirt. Contaminants will interfere with bonding to the surface, causing weak adhesion. A correctly prepared surface will promote excellent adhesion.
  6. Mechanical properties exceeded: in some instances, the mechanical properties (tensile and flexural) required may be below those required. Whilst fibreglass (GRP) is incredibly strong, structural applications it is always advisable to check in advance.

Tensile properties

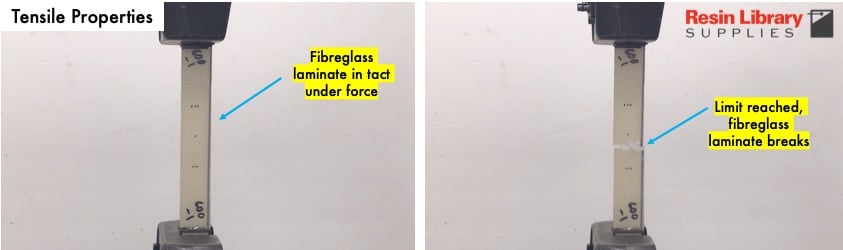
Tensile properties indicate how the fibreglass laminate repair performs under applied tension. Tensile tests are performed where a section of the laminate is  loaded while the applied load and the elongation of the laminate is measured. This is illustrated for fibreglass laminate in the images below.

Flexural properties

Flexural properties indicate the stiffness of the fibreglass laminate when flexed. Flexural testing will measure the force required to bend the laminate under three-point loading conditions. Flexural modulus is used as an indication of a material’s stiffness when flexed.

Please be aware that users making repairs using should consult Resin Library’s Fibreglass Repair Kit Manual available in our Downloads section of this page. Whilst this is not a one-size-fits-all approach, it does cover some of the basics of fibreglass repairs and could help prevent ineffective repairs from being made.

Training, Apprenticeships & Experts

Fibreglass is a composite and training in the field of more general composites is highly relevant. A range of composite repair training courses exist, from aeronautical, more general academic-led composite repair courses.

Apprenticeship schemes centring on composite repair are also available in the field of composite engineering.More specialist advice is available from experienced professionals, such as Professor Simon Frost and Professor Hom Dhakal who co-authored book a book about composite repairs.

Downloads

Safety & Technical Data Sheets

Technical Data Sheet – Unsaturated polyester resin

Polyester resin MSDS

Additional Resources

Fibreglass Repair Kit Manual_1.1

Polyester resin for laminating – an introduction

Creating a fibreglass laminate

Specification Documents

The following are specification documents for the fibreglass kit:

Concrete lining, coating and repair using fibreglass

Plywood lining, coating and repair using fibreglass

Fibreglass kit for timber repair, linings and coatings

Fibreglass lining, coating and repair kit


FAQs

Q. How do you use a fibreglass patch repair?

A. A patch repair usually involves an initial assessment of the condition, depth and surface area of the region. Kit sizes are based upon the surface area and the number of layers required. Surface cleaning to remove fragments and acetone to wipe away dust, dirt and grease are followed by the cutting of the matting. Thereafter, the resin is catalysed with MEKP (liquid hardener) and this mixed resin is then applied to the matting. This is inserted into and/or across the repair region and allowed to cure. More comprehensive instructions are available in our download section. Patch repairs are generally considered a short-term fix until a full repair can be made at a later date.

Q. Can this kit be used to repair chemical storage tanks?

A. Damaged storage tanks can be repaired with fibreglass, provided there is no reaction with the chemicals being stored. Users should therefore consider the compatibility of the resin with fibreglass and the concentration and temperature of the chemicals stored within the vessel. A suitable topcoat may also need to be chosen as well for added durability. More detailed chemical resistance charts are available. Please contact us for more information.

Q. Can this fibreglass repair kit be used to repair water storage tanks?

A. The polyester resin is WRAS-approved, meaning it is directly compatible with drinking water. However, a suitable topcoat may need to be selected to coat the repair patch for added durability or for cosmetic purposes.

Q. Is fibreglass better than carbon fibre for repairs?

A. Fibreglass is generally 15 times cheaper than carbon fibre and it is 3 times more flexible.

Repair systems should generally match the composites being used. Carbon fibre repairs are suited to more rigid, high-performance structures (e.g. mountain bike frames, carbon racecars, aircraft, etc.), whilst fibreglass repairs are more suited to more flexible ones (e.g., surfboards, yachts, boats, etc.).

As a rule of thumb, stick with carbon fibre if the structure is carbon fibre and fibreglass if the structure is fibreglass.

Q. What are the main benefits of using a fibreglass repair system?

A. ​​Long-term durability, low cost, low weight, fatigue resistance, high tensile strength, anti-corrosion, impermeable to liquids and thermal insulation.

Q. Is a fibreglass repair strong?

A. Yes, these repairs comprise a thin layer of laminate with a high strength-to-weight ratio. An optional topcoat layer of resin can be applied for aesthetics. High tensile strengths are typical of fibreglass making it an ideal repair system.

Q. How will a fibreglass repair perform once cured?

A. Resin Library’s Fibreglass Repair Kits are designed to create repairs that offer a high elastic modulus adding to the mechanical properties of the structure. The resin (matrix phase) is designed to transfer and distribute stress from the fibres (reinforcement phase) to protect them from ongoing mechanical and environmental stressors. Additives may be included subject to the user’s discretion, such as fillers, as a means to reduce shrinkage and lower cost. A UV-resistant resin should be applied to protect the underlying fibreglass, which itself has low-moderate UV resistance.

Q. Do I need a primer for a repair?

A. If added adhesion is required, or if the underlying surface may be exposed to frequent dampness, then yes, use a primer. For instance, a fibreglass pond lining will necessitate a primer given its close proximity to groundwater. A flat roof on the other hand, where the surface is a dry timber deck, will not require a primer. If repairing a surface in a shower or wet room, then a primer may be needed. Primers can be applied with either a paintbrush or a roller.

Q. How long does it take to repair a surface using fibreglass?

A. Curing should occur within an hour, although some mild tackiness may remain. Generally, a full cure requires 24 – 48 hours, but this can be greatly reduced by increasing the catalyst concentration and curing temperature. A large hole or crack, for instance, might require more extensive work.

Q. What does a fibreglass repair look like?

A. A newly cured repair will have a mildly textured finish and a dull yellow/brown colour. It should also be mildly glossy. For cosmetic purposes, users will often sand back the repair to create a surface consistent with the structure being repaired. A resin paint (also known as a topcoat or gelcoat depending on the application) will then be applied to the repair surface. A range of colours is available from the RAL and BS colour schemes. Some polishing may be required to further render the surface consistent with the original.

Q. What is a fibreglass repair?

A. Fibreglass repairs involve the adhesion of a thin layer to a surface (e.g. a hole or a crack) like hard plastic, wood, existing GRP, etc. It should present good mechanical properties whilst adding little or no additional weight relative to the base surface. Laminates are polymer composites composed of catalysed polyester resin mixed into glass fibre matting. An additional layer of resin paint/topcoat may be applied for aesthetic purposes.

Q. How durable is a fibreglass repair?

A. A high-quality repair will match or even exceed the mechanical properties of the base structure. Durability can be improved by adding additional layers for extra reinforcement. For an advanced understanding, composite education is often cited as being an advantage for any type of composite repair. Likewise, composite repair training courses are also available and highly relevant to fibreglass.

Q. Can you laminate over existing fibreglass?

A. Yes, it is fairly simple to do so. This procedure involves several steps: (1) remove the source of any moisture or dampness, (2) scale back the surface using sandpaper or an equivalent, (3) fill and gaps or holes with a filler (e.g. foam or paste) and allow to dry, (4) sand back the surface and wipe with acetone, (5) apply small sections of pre-cut matting soaked in catalysed polyester resin and layer up several layers as necessary and allow to cure (2 hours), (6) apply topcoat/paint if/as needed.

Q. How can I make a fibreglass repair smooth?

A. Follow the instructions detailing a fibreglass repair up until the topcoat application step. Once the laminate has been applied, allow it to cure and then sand back the surface. This will achieve a smooth surface that can be shaped in line with the structure being repaired. Once the surface has been resurfaced, a topcoat resin/paint of choice can be applied.

Q. Can I use fibreglass resin without glass fibre matting?

A. Fibreglass resin is polyester resin (an unsaturated form). Without glass fibre matting or another reinforcement phase, it is brittle and prone to splitting. It should not be used without reinforcement. 

Q. How can I stop the paddle roller and polyester roller from clogging up with resin?

A. Tools should be soaked in acetone, a solvent, to dissolve and remove pre-cured resin prior to gardening. Resin Library supplies acetone as an optional material and it is recommended for users working with resin.

Getting Started

Q. Is fibreglass the right material for my repair?

A. Ask yourself the following questions: (1) will fibreglass bond to the surface of the material I am repairing? (2) what will the mechanical and waterproofing implications be? (3) what preparation work do I need to do? (4) is the damaged section able to be repaired, since some repairs require access to both sides of the structure, (5) will the fibreglass repair match up to the original structure in terms of its mechanical properties?

Ultimately, if the answer to these questions is yes, then fibreglass is suitable. It is considered an excellent material for the repair of concrete and other substrates.

Q. How much fibreglass do I need for a repair?

A. This depends on the size of the patch, with both the dimensions and depth (number of layers of matting) dictating the size of the repair. It is always a good idea to purchase a slight excess to ensure the repair patch adequately covers the damaged section by a few inches (or 10%) to ensure mechanical strength.

Q. What materials can I repair with fibreglass?

A. Fibreglass bonds to plywood, existing fibreglass, concrete, OSB3 timber, as well as certain metals and plastics. 

It is important to achieve adequate surface preparation to create a clean, dry surface free from grease and other contaminants are recommended in advance, as is the application of a resin primer to maximise bonding.

Q. How long will a fibreglass repair take to make?

A. Surface preparation = 5-20 minutes, cleaning = 5 minutes, glass fibre cutting = 5 minutes, polyester resin preparation = 5-10 minutes and laminating = 5-15 minutes. Partial curing of the laminate = 1-2 hours, full cure = 24 hours.

Q. When will a fibreglass repair be waterproof?

A. On average, partial cures should occur within 2 hours and a full cure within 24 hours. Curing times can vary according to temperatures and catalyst concentrations. 

Q. How many layers of fibreglass should I use for a repair?

A. This depends on the type of repair and the mechanical strength required. If a repair patch is being used, a single layer of 600 gram CSM, for instance, could be used. If a stepped scarf repair is used, then multiple layers of matting is recommended. 

Note: users should aim to match the mechanical characteristics of the repair to that of the existing structure.

Q. What will a fibreglass repair look like?

A. A standard fibreglass repair without paint and without resurfacing will be a light yellow/brown colour with a mildly rough texture due to the glass fibres. If sanding in performed, this should be smoother and more consistent with the base surface. If a topcoat paint/resin is applied it should blend in with the main structure itself.

TroubleShooting

Any work with composite materials requires correct surface preparation and laminating inside a compatible working environment. 

Guidance documents are available in the Downloads tab.

Any composite repair requires a degree of skill to diagnose and implement repairs to the damaged structure in order to restore it to its original state.

This can be achieved by following best practices – some of which are outlined here – but also by having realistic expectations as to what can be achieved.

The purpose here is to help users identify reasons for substandard laminate and where possible to provide workable solutions.

ProblemCauseSolution
Glass fibres are sticking out of the fibreglass patchIndicates incomplete/insufficient laminating via too little resin and/or improper laminating technique (a roller followed by a paddle roller should be used)Sand down and re-apply resin over dry areas if suitable or remove the laminated patch and re-apply laminate. Follow correct laminating instructions outlined in product guide.
Fibreglass patch not stickingwater ingress or ongoing moisture/damp not addressed. Interferes with laminate bonding to the underlying substrate. remove fibreglass patch. Inspect the damaged section for moisture or water ingress. Address source of moisture and ensure substrate is dry. Follow correct laminating instructions outlined in product guide. Consider adding a primer pre-laminate. Ensure surface is coated in resin pre-laminate application.
surface contains residual contaminants/debris which have not been removed. Interferes with laminate bonding to the underlying substrate. emove fibreglass patch. Inspect the damaged section for contaminants. Remove contaminants and clean with acetone if non-porous (e.g. existing fibreglass). Address source of moisture and ensure substrate is dry. Follow correct laminating instructions outlined in product guide.
incorrect mixing procedures used for resin preparation (e.g. insufficient MEKP catalyst, contaminated resin, insufficient catalysed resin per unit area of matting)remove fibreglass patch. Follow correct laminating instructions outlined in product guide.
incorrect or substandard laminating procedures, meaning resin has not adequately saturated the glass fibre laminate and/or the laminate is not fully bonded to the substrate.remove fibreglass patch. Follow correct laminating instructions outlined in product guide. Ensure thorough laminating practices are performed (e.g laminating with a polyester roller followed by a paddle roller).
Fibreglass laminate has white blotchy patches/protrouding fibres and/or pinholesincorrect preparation procedures (e.g. insufficient catalysed resin per unit area of matting)remove fibreglass patch if cured or deemed defective. A further application of catalysed resin could be made if this is able to improve bonding and laminate quality. Follow correct laminating instructions outlined in product guide.
incorrect or substandard laminating procedures, meaning resin has not adequately saturated the glass fibre laminate and/or the laminate is not fully bonded to the substrate.remove fibreglass patch if cured or deemed defective. Follow correct laminating instructions outlined in product guide. Ensure thorough laminating practices are performed (e.g laminating with a polyester roller followed by a paddle roller). A further application of fresh resin could be made if this is able to improve bonding and laminate quality.
Fibreglass patch still ‘wet’ after 24 hoursSuggests non-curing. Incorrect mixing procedures used for resin preparation (e.g. insufficient MEKP catalyst, resin exposed to water during application) and/or sub-optimal application and curing conditions. remove fibreglass patch. Follow correct laminating instructions outlined in product guide. Ensure surface and environment are both dry and temperatures of application and curing range from 10 - 25 oC.
Topcoat paint/resin not sticking to laminate repair Surface is contaminated or wet. Topcoat paint may be incompatible with fibreglass. If catalyst used for topcoat resin, may have used incorrect concnetration.Confirm compatibility of paint with fibreglass (namely polyester resin). Ensure fibreglass is clean, dry and has been wiped with a clean acetone wipe prior to topcoat application. Ensure correct catalyst concentration used if relevant.

Damage Assessments

Assessing the damage to any structure is a critical part of the repair process.

Three techniques can be used to inspect damage upfront. 

The majority of damage is visually obvious and is evidenced by:

  • + Surface localised cracks, chips and abrasion
  • + Distorted structures 
  • + Abnormal accumulation of moisture, grease and dirt
  • + Blisters, bubbles, and a ‘spongy’ texture
  • + Cracks and fractures
  • + Exposed fibres
  • + Gouges
  • + Joint decoupling 

Inspecting a fibreglass structure may necessitate the removal of internal components, such as equipment or insulating layers. The area should be cleaned to remove any contaminants and loose debris. A hammer or equivalent can be used to knock the damaged areas to determine the extent of any damage. 

  • Probing

Surface defects (e.g. cracks, delaminated areas and others) can be assessed by probing with a sharp object whilst a ruler may indicate the physical dimensions of a defect. 

Note: cracks along the surface could indicate more extensive delamination

  • Hammer sounding 

Using a hammer to detect delamination and other damage in a laminate is highly effective. Sound generated by knocking can help distinguish between damaged and undamaged regions. But also note this could be due to the physical properties of the structure. 

What to listen for?

  • Undamaged laminate = a dull sound upon impact
  • Damaged laminate = a higher-pitched sound

You can also feel differences in the impact by placing your hand on the surface of the laminate when impacting it. The extent of any damage can often be clearly indicated using this method. 

  • Water-contaminated laminate

Damaged sections of laminate contaminated by water may require rinsing with clean water – particularly if salt contamination has occurred. If so, let the area dry for at least 48 hours. This drying process can be accelerated with heating equipment – particularly if airflow is included. 

The laminate itself can be monitored using a moisture meter or if possible, core samples can be taken.

It is generally advisable to only commence working when the moisture content of the area is <0.5 % by weight.

Prior to implementing the repair, an acetone wipe of the surface can enhance the adhesion between the repair and the surface. However, be sure to allow the acetone to dry off as it could interfere with the bonding.

Damage Removal

The removal of damaged sections is necessary in creating an accessible region amenable to repair.

Steps should be taken to minimise the generation of dust and particulates. This means PPE (masks, safety goggles, gloves, etc.) is recommended and at larger scales, vacuum extraction equipment should be used. Dust can damage equipment and contaminate repairs. 

A general procedure for removing damaged sections can be summarised as follows:

Option 1 – Damage extends partially through the surface region:

  • remove the damaged section(s) with a 16-40 grit disk. The damaged area itself can be shaped and smoothed using a 60-80 grit disk. 

Option 2 – Extensive removal required

  • grinding is likely to be inefficient; it will create excessive dust and so an alternative method is recommended. This could involve making perpendicular cuts into the laminate using a: 
    • circular saw (with a diamond grit)
    • masonry blade
    • die grinder with 1.5 to 2” cutting wheel
  • the cuts should extend to the depth of the damage. Damaged laminate can be undercut and removed with a wood chisel.

Option 3 – Damage extends through the structure

  • Use a circular saw or equivalent

Type of Damage

The following section outlines the types of damage encountered in fibreglass composites. 

Note: the kit outlined here is not recommended for applications that will place significant mechanical demands on it and/or ones where the safety of persons involved will be at risk. In such instances, always contact the manufacturer for more information.

Surface Damage

Surface-localised damage is evidenced by cracks, abrasion and blisters in fibreglass. The depth is often under 2 mm and does not enter the primary reinforcement or substrate layer. Such damage bears no structural consequences but it can cause damage by allowing water ingress. 

Laminate Damage

Damage caused by excessive loads can lead to cracks, delamination and crushed reinforcement. Delamination will often start in areas where there are structural inconsistencies. This damage is deemed either partially-through thickness or through-thickness damage. 

Other types of damage specific to composites – such as marine composites – are discussed in more detail elsewhere.

Repair Quality Requirements

Once the repair has been made, it should be inspected prior to painting.

Ideally, the fibreglass layer should be smooth and blend into the surrounding surface. The hardness of the laminate should be +/- 10% based on the Barcol Hardness test (see technical specification in the downloads section).

The repair should also be free from:

  • + open voids, cracks, delamination, contaminants, etc.
  • + discolouration or exotherm
  • + exposed glass fibres uncoated in resin
  • + wrinkles in the laminate

Note: if voids are present, treat them on a case-by-case basis. Generally, voids under 12 mm can be repaired by drilling and resin injection. For larger voids, consider re-applying the laminate in that area.

Lay-Up Process

Fibreglass-based repairs to surfaces and structures can be made using wet lay-up methods “in-situ”. Generally, a thin layer of polyester resin should be applied onto a prepared surface (cleaned, free from debris and with a primer (if suitable) applied).

Note: polyester resin must be mixed with an appropriate concentration of MEKP catalyst before usage. 

This method minimises the probability of air entrapment underneath the layer(s) of fibreglass laminate. Each layer should be fully wetted out using a brush (for smaller areas) or a roller (for larger areas) and then consolidated with a paddle roller or equivalent. This process will help remove air bubbles and excess resin trapped inside the glass fibre. Repeat this process for successive layers until the desired thickness is reached.

Note: when applying multiple layers, be aware of the following factors:

+the number of layers laid out should not exceed the catalysed resin curing window. E.g., catalysed resin used outside of a 15 – 20 minute window will start to cure prematurely, leading to a deficient laminate. Instead, apply the resin in workable batches

+ laminating too many layers can risk an exotherm, heating the resin, making it brittle

+ rapid resin curing can also lead to shrinkage of the laminate

Generally, a total thickness of 6 mm is the total that should be laminated in one go for larger areas. However, for smaller areas or cooler temperatures, heat may not be as much of an issue. 

Note: if laminating onto sloped or overhead surfaces, pre-saturated sections of glass fibre matting with polyester resin onto a pre-wetted surface. The ai here is to ensure the edges of the laminate do not fall. In this example of a storage tank fibreglass repair, the tank itself was inverted to prevent fibreglass from peeling away.

Publications

The following publications are considered relevant in the field of fibreglass repairs:

+ Polymers (Basel). 2019 Oct; 11(10): 1667. Fiber-Reinforced Polymer Composites: Manufacturing, Properties, and Applications. Dipen Kumar Rajak,1,2,* Durgesh D. Pagar,3 Pradeep L. Menezes,4 and Emanoil Linul5,6,*

+ Spring 2015 Fiberglass Composite Repairs Presentation Brad Fenbert (Western Washington University) Ian Saksa (Western Washington University)

+ Materials (Basel). 2020 Jun; 13(12): 2740.  Mechanical Behavior of Single Patch Composite Repaired Al Alloy Plates: Experimental and Numerical Analysis Jingtao Dai,* Peizhong Zhao, Hongbo Su, and Yubo Wang

+ Materials (Basel). 2018 Dec; 11(12): 2351. Residual Tensile Strength of the Multi-Impacted Scarf-Repaired Glass Fiber-Reinforced Polymer (GFRP) Composites Punita Kumari,1 Jihui Wang,1,* and Saahil2

+ Marine Composites (Repair Procedures), Webb Institute, Eric Greene, (Eric Greene Associates)

Specification

Resin Library Fibreglass Repair systems have been independently tested for their mechanical and physical properties.

The specification document is available in the Downloads tab on this page. The following provides a summary of the results obtained for the single layer fibreglass repair (1 x 600 gram CSM) and a dual-layer fibreglass repair (2 x 600 gram CSM).

PropertySingle Layer (1 x 600 gram CSM)Dual Layer (2 x 600 gram CSM)Test
Expected laminate thickness1.20 ± 0.15 mm12.23 ± 0.21 mm-
Weight per area1.9 ± 0.1 kg/m23.0 ± 0.2 kg/m2-
Hardness86.2 ± 1.4 (n=5)85.7 ± 1.6 (n=5)ISO868
Density1.44 ± 0.01 kg/m3 1.41 ± 0.02 kg/m3 ISO1183-1ISO1183-1
Tensile strength81.9 ± 8.5 MPa93.7 ± 3.8 MPaASTM D3039ASTM D3039
Tensile modulus6552 ± 819 MPa5058 ± 457 MPaASTM D3039ASTM D3039
Flexural strength183.6 ± 26.8 MPa161.6 ± 16.1 MPaASTM D7264ASTM D7264
Flexural modulus5364 ± 507 MPa6776 ± 528 MPaASTM D7264

Note: the dual-layer laminate repair (2 x 600 gram CSM) is created by doubling the layers of matting successively and the resin utilised. Please refer to instructional guidance. Practice in advance.

Disclaimer: results were obtained under laboratory conditions. Results are not necessarily reflective of what will be achieved for your installation. This data is for general, informational purposes only. Resin Library is not liable for any outcomes.

Videos

Resin Library has a series of videos designed to provide product users with basic guides on how to use our products and tools.

The video below shows an example of a fibreglass repair kit being used to refurbish a damaged water storage tank.

Starting with a dry concrete base, the video shows surface preparation, fibreglass laminating and topcoat application. Note that a grey resin topcoat was chosen to provide added waterproofing, abrasion resistance and aesthetics to the laminate. More detail about this product is available in the Downloads tab, including a more detailed step-by-step guide.

Prospective users can also find out more about our repair kits by watching the video below:

Additional information

Weight N/A
Size

0.1 m2, 0.25 m2, 0.5 m2, 1 m2, 2 m2, 3 m2, 5 m2