Bumpers on cars, trucks and other vehicles serve as a lightweight, flexible form of protection. Upon impact, they have a tendency to dent or
Car Bumper types
Materials. Most vehicle bumpers are plastic-based. They might have a metal reinforcement bar hidden in the middle.
Reasons for damage
Impact with an object or animal is the most common cause of damage to a car bumper. Damage usually happens to both the front and rear bumper 50/50 in most cases. In no particular order, these are:
– Impact from or with another vehicle
– Impact from or with an animal (e.g. deer)
– Impact with an object (e.g. lamp post)
The reason for the collision is can be attributed to either the driver
In some cases the vehicle is stationary
Motorsport collisions are a popular reason in many cases and with cars driving on close proximity at high speed, there are typically a lot of front and rear collisions.
Using Fibreglass to Repair a Car Bumper
The same procedures used to repair cracked fibreglass and other types of plastic can be used as a basis for repairing car bumpers.
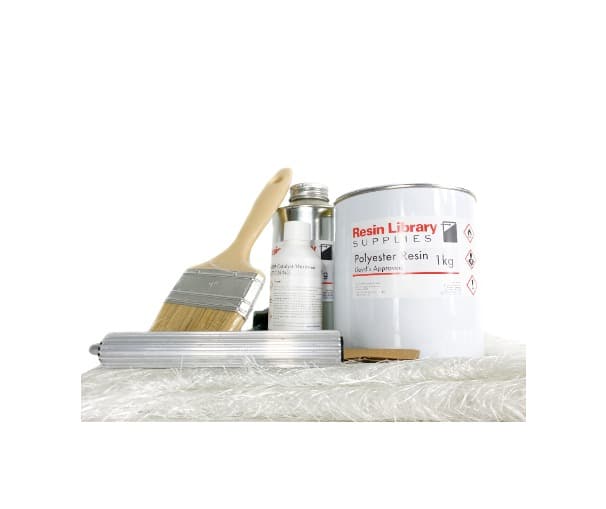
More detailed fibreglass repair instructions are available with repair kits. A more specific guide on how to repair a damaged bumper is outlined below.
This section assumes you have estimated the size of the damaged area and selected a suitably sized fibreglass repair kit.
Preparation
1. Carefully remove the bumper from the car and place it on a suitable solid surface.
2. Clean the bumper with soap and water if necessary and allow it to dry.
Note: a clean and dry surface is a necessity in the creation of a reliable fibreglass repair.
3. Assess the damaged area of the bumper. Sand back any cracked or raised areas of the bumper using a small grinder. Alternatively, sandpaper (e.g. 60 or 80 grit aluminium oxide) can be used for smaller or more complex areas.
4. Once the surface is smooth, wipe with a clean acetone-soaked cloth to remove dust and dirt and to provide a clean surface for fibreglass adhesion.
Note: take care to wear gloves when using acetone as it is can cause skin irritation.
Glass fibre chopped strand matting (CSM)
5. Cut the glass fibre matting using a stanley knife. Aim to create a few centimetres of overlap around the edge of the damaged area.
Polyester Resin & MEKP Catalyst
6. Prepare sufficient polyester resin for the amount of glass fibre matting used. Generally, around 1.5 – 1.7 kg of polyester resin should be applied to each square meter of 600-gram glass fibre CSM (specific to Resin Library’s kit).
7. MEKP catalyst must be added prior to application and used within a 15-minute window. MEKP catalyst should be added to create a 1 – 4 % weighted ratio to that of the resin. This means 1 mL of MEKP catalyst added to 1 kg of polyester resin. Mix the catalyst into the resin using a clean mixing stick.
Note: Amounts added outside of this range will lead to sub-optimal curing and laminate failure.
Note: most applicators prepare around 0.5 – 2 kg of catalysed resin – enough to cover 0.5 – 2 square meters of glass fibre matting, but smaller quantities may be needed for vehicle bumper repairs.
Fibreglass Laminating
8. Carefully apply the catalysed resin using a small laminating brush. If possible use a small paddle roller to consolidate the resin and remove air bubbles.
Note: paddle rollers are easier to use over larger areas. For smaller areas, simply applying moderate pressure with a paintbrush will suffice.
Curing & Sanding
8. Allow the laminate to cure for 24 hours and then sand it back to give a smooth, contoured finish consistent with the shape of the bumper.
9. The glass fibre will have repaired your crack or split and is now ready for painting. At this point, it is advisable that you contact the manufacturer for the correct paint and colour scheme.




 Fibreglass Bumper Repair Kits